Using Azure functions for parked domains
Posted · 4 min read · 654 words

If you’re a business of any size it’s common to buy similar domains to yours to prevent them being used for phishing or spoofing attacks against you or your counter parties. So, if you’re Apple, your might buy aple.com.
Step 0: Setup DMARC
Once you own a parked domain you’ve prevented anyone from directly using it against you. A good next step is to set up SPF, DKIM and DMARC records which tell any email system receiving e-mail from this domain to reject it. The records are pretty simple. Two TXT records on your top level domain:
v=spf1 -allv=DKIM1; p=
Then, a TXT entry for the subdomain of _dmarc
"v=DMARC1; p=reject; rua=<email>; ruf=mailto:<email>;"
Where <email> is the email address you want any rejection notices to go to (You want these, they will tell you if someone is trying to actively spoof you).
You can easily stop there. Typically your domain name provider will put up parked domain web pages for HTTP and HTTPS traffic. However, these are generally not that pretty, don’t reference your brand and what if you want those mistyped domain names in the browser to be redirected to your website?
Classically, you would setup a web server and configure it to send a HTTP 301 redirect to your web site. To avoid warnings in modern browsers you also need to configure certificates so you can respond to HTTP and HTTPS traffic.
Then, you have to patch and maintain the whole server stack.
Here’s an easier way using Microsoft Azure Functions. These, like AWS Lambdas, are small pieces of code running server-less on Azure which respond to a trigger, in this case HTTP.
Step 1: Create the redirect function
Once you’ve created your Azure Function container you need to create the actual function to do the redirect. You can build this in any of the supported languages, here’s simple a .NET version
using System.Net;
using Microsoft.AspNetCore.Mvc;
using Microsoft.Extensions.Primitives;

public static async Task<IActionResult> Run(HttpRequest req, ILogger log){
    log.LogInformation("Invoked");
    // Use Arr-Disable-Session-Affinity to remove session cookies on response
    req.HttpContext.Response.Headers.Add("Arr-Disable-Session-Affinity", "true");
    return new RedirectResult("https://yourwebsite",true,false);
}
Once you’ve create the function, give it a route: /api/r for example.
Step 2: Configure Proxy
By default, Azure functions won’t respond to an empty path. We can configure the Azure Function proxy to create a route from any path to the function:
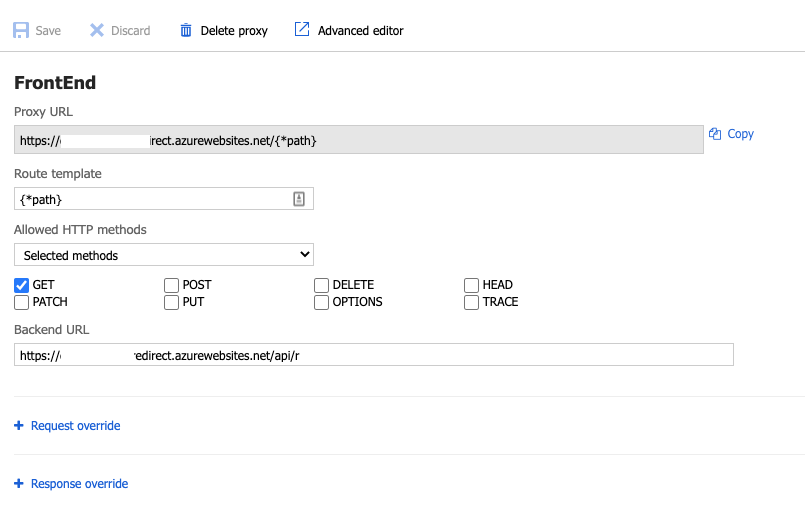
Here, we’re saying only accept GET requests and whatever the path is, send the traffic to /api/r
Step 3: Connect custom domain
The next step is to connect your previously registered domain. Click custom domains and then the ‘Add custom domain’ button. You can add multiple:
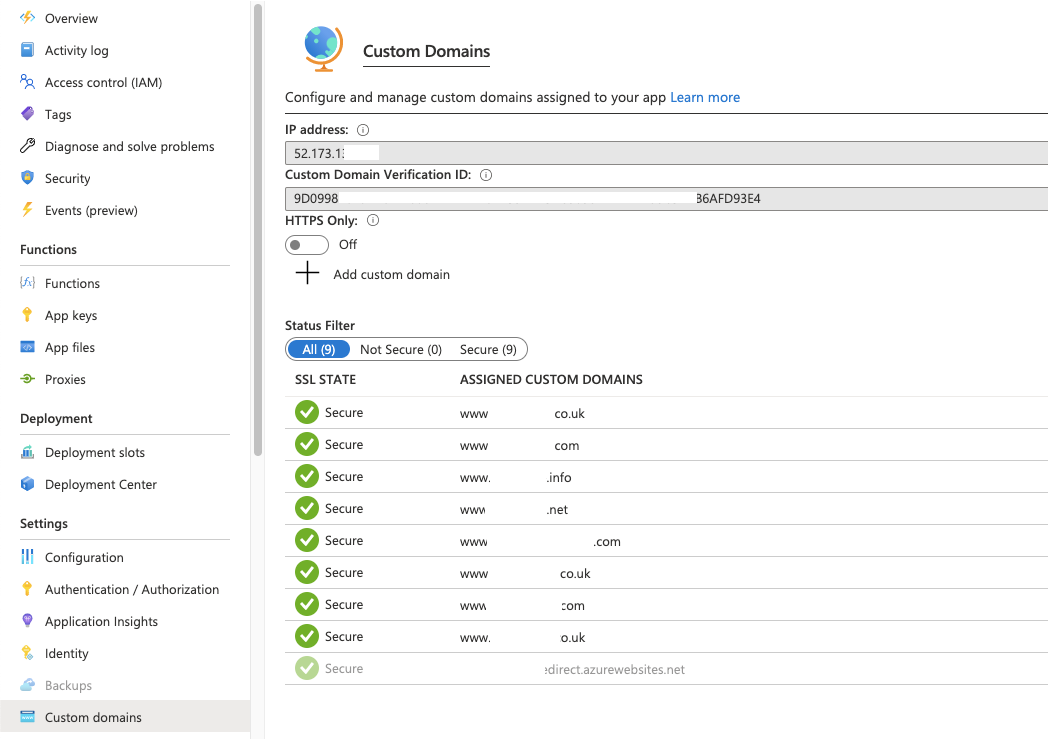
‘Add custom domain’ will take you through the process of proving ownership of the domain: first by adding an asuid TXT record to prove the domain verification and then a CNAME to point to your proxy URL of the function. DNS propagation isn’t immediate so you may need to wait a while before the Azure wizard will let you add the domain.
Note that naked domains e.g. ‘apple.com’, are not currently supported.
Step 4: Add SSL
At this point, you can test redirects using HTTP but your browser will likely whine at you. To fix that you need to procure SSL certificates. Feasibly you could do that using Lets Encrypt but Microsoft recently made this way easier with App Service Managed Certificates. To generate a certificate for your new domain, click TLS/SSL settings and then choose the private key certificate option.
Next, click ‘Create App Service Managed Certificate’:
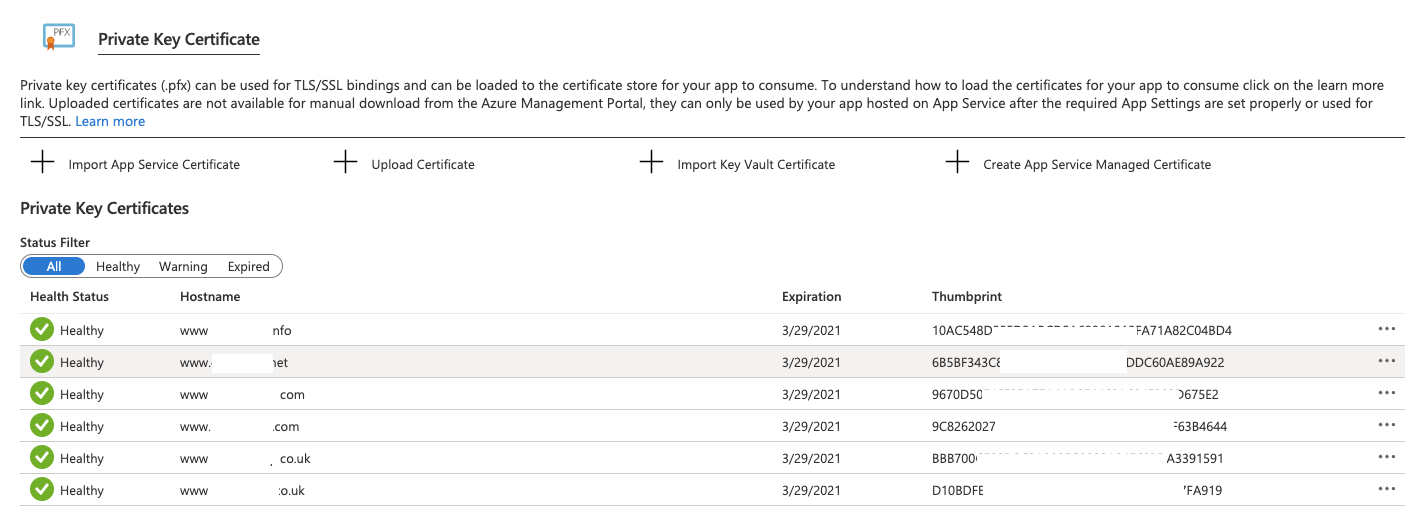
Create your certificate and then head back to the custom domains section to bind your certificate to the domain. Now HTTPS traffic should redirect without complaint.
To conclude, this is a pretty simple way of managing 301 redirects for parked domains. Minimal code, low effort and cost: Azure takes care of most of the work. My thanks to PepperCrew who inspired this approach.
Updated 10/1/2020 to show how to remove session cookies